

Bunker Alfa is the most important resource for beginners in Last Day On Earth. Bunker Alfa is the key to progressing in the game. If you want to level up quick, and stock up on guns and armor as a beginner, Alfa is the one and only place for you. You can be 100% sure, that if you regularly clear out Alfa every time it resets, you’ll be rich. For helping you with this exact purpose, we have for you – The Bunker Alfa Beginners Guide.
NOTE – This guide will only cover Sublevels 1, 2 and 3. The 4th Floor is not worth the amount of firepower required. It is especially not useful if you don’t have the True Friend trait on a level 4 Dog, which is impossible to get for a beginner.
Description Of Bunker Alfa
Bunker Alfa is one of the three Army bunkers that can be found on the Global Map in Last Day On Earth. It consists of a ground-floor level and four underground sub-levels that can be accessed via a passcode (obtainable from dead soldiers in resource areas or with CB Radio). For beginners, these floors can be difficult, but with a few decent weapons, and two sets of at least Tier 1.5 (Re-inforced Shirt) Armor and above, along with three to four sets of healing items (Carrot Stew, because it is the cheapest to make), you can get through these floors without dying.
Zombies in Alfa
There is a difference between the zombies you encounter outside the Bunker and inside. Notably, some of the zombies in the sublevels have unique traits. They do not use special attacks, and they have altered (usually reduced) sight ranges, including attacking the player in groups if one is alerted. They also do more damage than zombies outside the bunker. You will have to fight these zombies in Alfa –
- Roaming Zombie – (2nd floor only, 40 HP).
- Fast Biter – (80 HP).
- Toxic Spitter – (3 types, No spitting attack, 100 HP).
- Floater Bloater – (3 types, no special attack, both with 240 HP).
- Toxic Abomination – (3 types, no sumo attack, both with 300 HP).
- Frenzied Giant – (3 types, both with 500 HP)Hard mode Frenzied Giant has greater speed, further accelerated when injured to below 150 HP.
- Exploder– They appear during hard mode only and explode with health less than 50, spawning 3 Parasites (40 HP each).
- The Blind One (1000 HP, heals at 700 and 400 HP) – He appears during hard mode only, on Floor 3, past an antechamber and access terminal.
Other Hazards
- Turret: An automated turret attacks the player once in range. It has 250 HP, a 360-degree attack radius, and range approximately equivalent to the Glock 17. Turrets have an armor rating that reduces incoming damage by half. These turrets do not attack zombies, but they do shoot you.
- Heavy turret: Appears on the 4th floor only. It has 500 HP, a 360-degree attack radius, an armor rating that reduces incoming damage, and range approximately equivalent to the normal turret. Heavy turrets not only shoot but also launch grenades (like the Milkor MGL) at you. These turrets do not attack zombies.
- Gas Chamber: This is a room entirely filled with poisonous gas. The gas does damage to the player at a very high rate unless they equip a Gas Mask (which absorbs damage while exposed to the gas but will break if used for a long time).
- Gas Leaking From Pipes: Some areas contain gas bursting from pipes. This gas does damage to the player at a very high rate. Depending on the location, some pipes can be shut off from a source valve, or the gas may only leak at periodic intervals and can be passed if timed properly. Additionally, the Gas Mask can be equipped to protect the player from damage, as in the Gas Chamber. Zombies are immune to the effects of the gas.
- Gore: Gore is usually indicated by a red-colored area on the Minimap. The effect on the player is to reduce their movement speed while in these areas by approximately half, but it does not affect zombies. Additionally, in halls with arms protruding from walls, contact with the arms will cause 3 damage to the player. These arms do not damage armor.
Outside the Bunker and in the upper level of Bunker Alfa
The outside area of the main level contains 17 Pine Trees and a lootable corpse with a half-used Glock 17 in its inventory when you go there for the first time. First-time access to the Bunker’s interior requires a CAC Card A, which you can acquire from loot or enemies at various zones on the Global Map. After using the access card, this area will remain unlocked permanently and you won’t need the CAC Card A anymore.
There is also a Minigun inside a cage near the outer wall, near the entrance, but you need a Rank 4 True Friend dog to get it.
Inside the Bunker, on the Upper Level, there are no zombies. There is an Elevator which helps you to go down to the sublevels underground. There is an access terminal that requires a code to open the elevator and access the lower floors. Without the proper code, the elevator won’t open.
Getting The Code
- CB Radio in your base
- Dead Soldiers marked with an “X” in red, in various resource zones.
- On the official Last Day On Earth Discord server.
Sub-levels of Bunker Alfa
The sub-levels of the Bunker functions differently from the ground floor. You require a unique code that changes every other day, in order to access them. Once you activate the terminal, an entrance (Elevator) to the sub-levels unlocks for 48 hours (from the time of opening) before reset. The enemies that you kill during this time, the items that you find will be undisturbed wherever you decide to put them in the bunker. However, on reset, if you haven’t retrieved your items from the lower floors, you will lose them forever. That is why many players recommend keeping any items you find, in the storage lockers on the Upper Level. Those lockers do not reset, and your items will be safe there.
First Floor/Lobby
The first floor serves as a “lobby” area and contains several features related to the lower areas of the bunker. A notable feature of this floor is the Coupon Exchange terminals, which help to obtain loot-filled reward crates. There is also an Army Specialist whom you can rescue at the end of the second sub-level, and he will return to the lobby and unlock the Overseer Room, where he will offer several benefits to the player. 6 zombies spawn here (5 Fast Biters and a Floater Bloater).
Locked Door – There is a door beside the Green Coupon Crate Terminal, which you can unlock with a Cut Finger found at the Destroyed Convoy event that appears regularly on the Global Map.
Coupon Crates
Coupon Exchange: You find the coupons for opening the crates on the corpses of killed zombies and from boxes/lockers in the bunker. Additionally, there is a low chance of finding coupons outside the bunker (red zones, airdrop events).
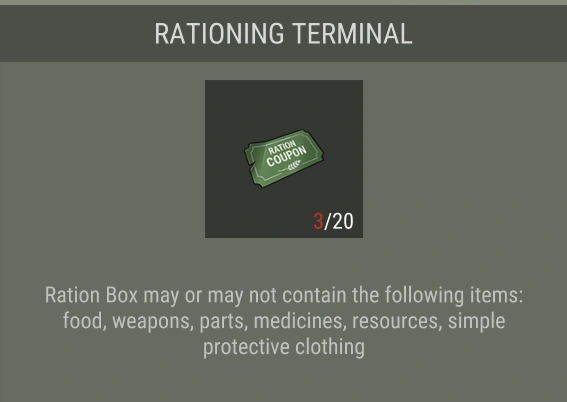
Rationing Terminal (16 items): For opening each Ration Box, you need 20 Green Coupons. You can get food, weapons, parts, medicine, resources, and Tier 1 Armor, but it may contain none of them.
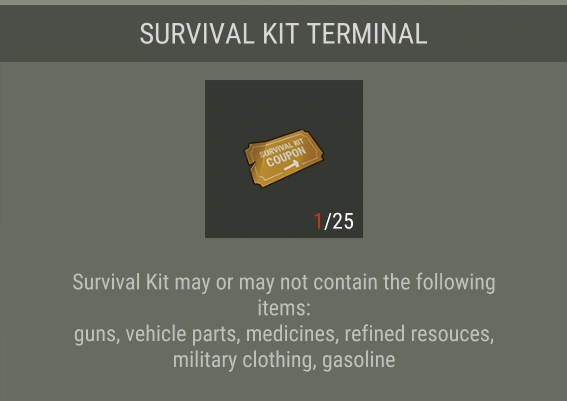
Survival Kit Terminal (17-20 items): You need 25 Yellow Coupons for each Survival Kit. You can get guns, vehicle parts, medicines, refined resources, military (Tier 3) Armor, and gasoline (Small chance).
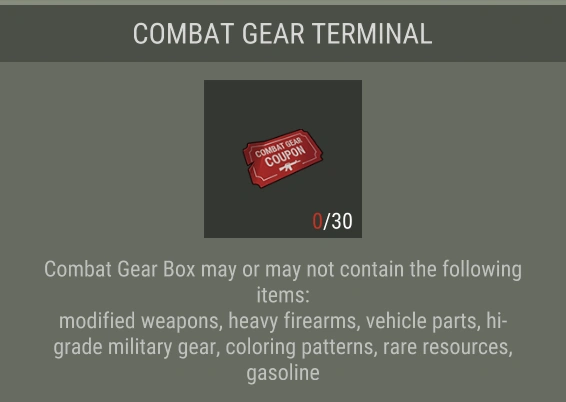
Combat Gear Terminal (26-29 items): You require 30 Red Coupons for each Combat Gear Box. You have a chance to get modified weapons, heavy firearms, vehicle parts, Tier 4 Armor, coloring patterns, rare resources, and Gasoline (Small Chance).
Overseer Room
This is a room where The Specialist exchanges your weapon mod blueprints for other blueprints, either of higher or lower rarity. This room is only useful during Hard Mode. Hence, it is not important for beginners.
Floor 2
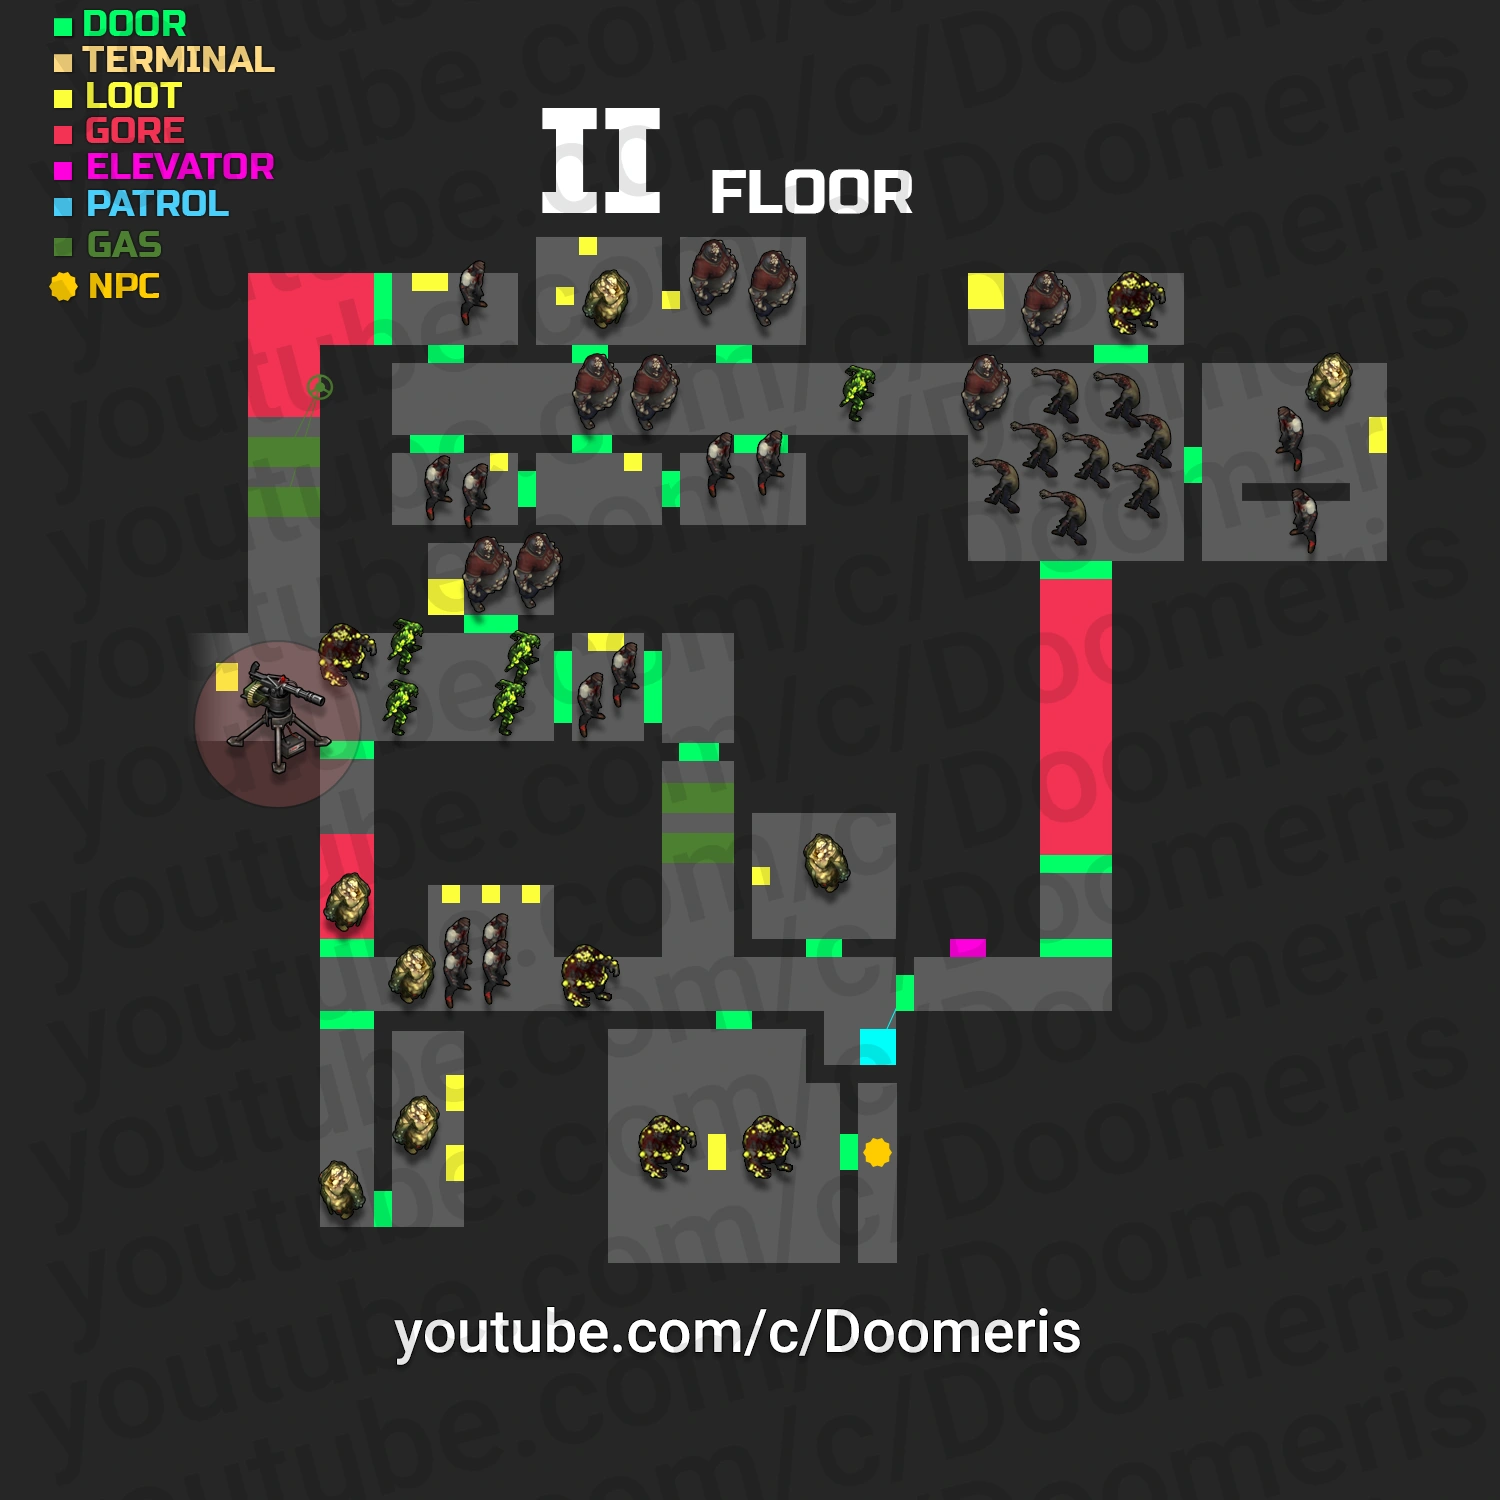
Floor 2 includes gas leaking from pipes (some of which can be shut off by a valve), gore areas, a terminal-controlled door, a turret, and Frenzied Giants, among other enemies. There is also The Big One in a lab, but he can only pace from side to side–he cannot attack.
Zombies on Floor 2
- 8 Roaming Zombies (Gore Passage Only) (Green Coupon)
- 13 Fast Biters (Green Coupon)
- 5 Toxic Spitters (Green/Yellow Coupon)
- 8 Floater Bloaters (Yellow Coupon)
- 5 Toxic Abominations (Yellow/Red Coupon)
- 7 Frenzied Giants (Yellow/Red Coupon)
We suggest to beginners that you should kill only the Frenzied Giants with your Glocks. For all other zombies, use melee weapons as much as possible. This will greatly help you to conserve your firearms.
Bunker Alfa Map (Floor 2)
Floor 3
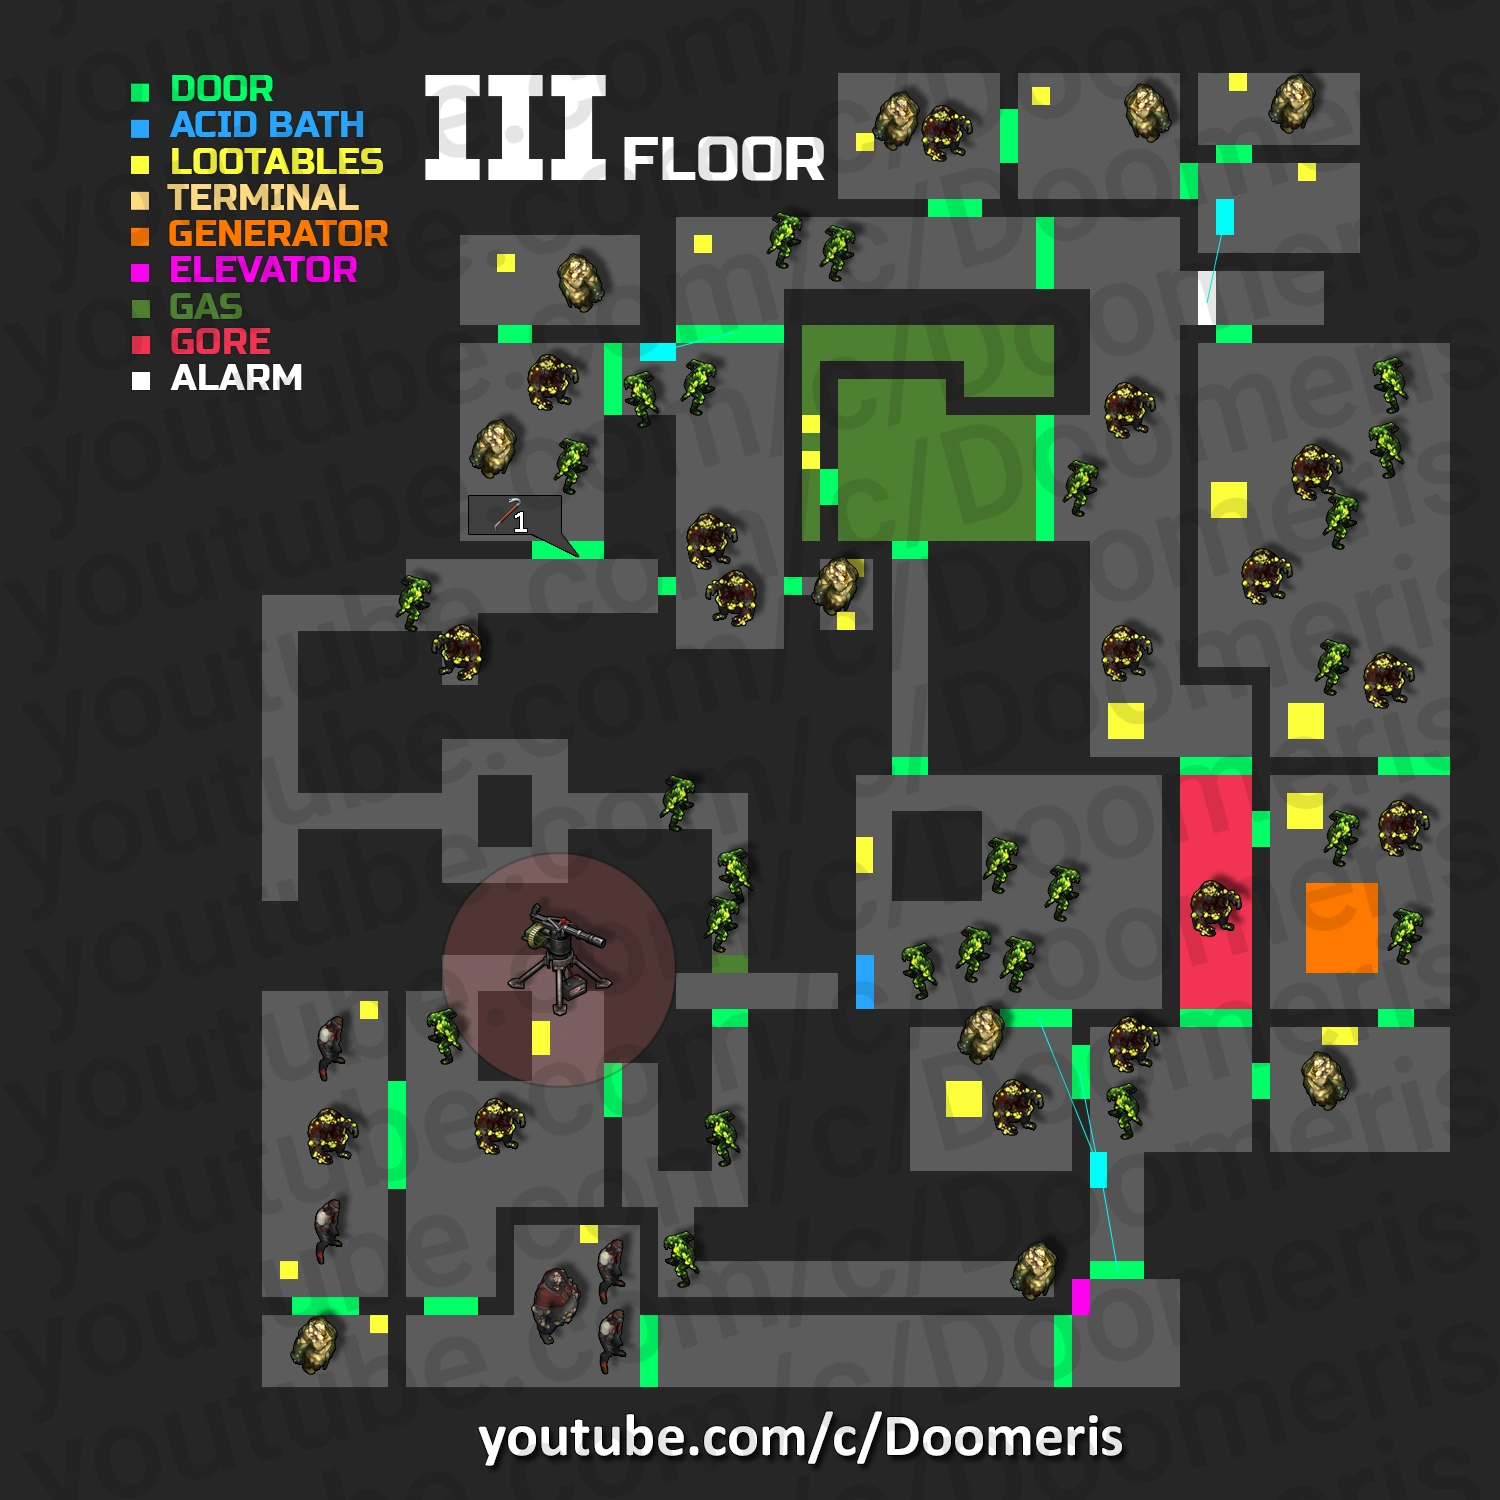
Floor 3/ Sub-level 3 is a bit more difficult than Floor 2. Mainly because of the increased number of zombies. You don’t have to clear it in one go. Remember, always prioritize your weapons and armor. If you have any of these at low durability, go back and gear up, because the Bunker won’t reset for two days and the defeated zombies will stay dead. Here too, the same guidelines apply – If you have low durability wp. It would be even better weapons or armor, go back to your base and gear up. In addition to gore and a turret, there are also laser alarms here, which go off the moment you cross them. You will also get most of your Yellow and Red coupons here, because of the higher number of Toxic Abominations and Frenzied Giants.
Zombies on Floor 3
- 4 Fast Biters.
- 25 Toxic Spitters.
- 1 Floater Bloater.
- 16 Toxic Abominations.
- 10 Frenzied Giants
Map Of Floor 3
Bunker Alfa Map (Floor 3)
That’s it for the Bunker Alfa Beginners Guide! If you have any queries regarding Bunker Alfa, feel free to post them below!
For more quality mobile gaming content, follow us on Facebook, Twitter, and Instagram.
There are only 3 floors covered here, what about the rest? Ive completed the first 4 without too many issues, but i cant get the elevator to go to 5 and 6…